Attention Ladies – Let’s Talk Bras

Attention Ladies – Let’s Talk Bras

Anuschka’s

Blog

Photographer in Adelaide, South Australia

ATTENTION LADIES - LET'S TALK BRAS

When it comes to preparing for a photo shoot, there are a million things to consider—lighting, angles, makeup, outfits—and one often overlooked element:

The BRA.

Yes, the right bra can make or break your outfit and your overall look in a photo shoot. Whether you’re capturing maternity photos, family shots, or a professional portrait, wearing the right bra is essential for both comfort and a flattering silhouette. But what exactly does the “perfect bra” look like, and how can you choose one that enhances your photos?

Not only does it provide support, but it also smooths out any bumps or bulges, giving you a sleek, polished appearance. Here’s why the right bra is crucial:

Support: A well-fitting bra provides the necessary support, ensuring you feel comfortable and confident, especially during longer shoots.
Smooth Silhouette: A good bra creates a smooth, seamless look under your clothing, preventing any awkward lines or bulges that might show up in photos.
Shape and Lift: The right bra lifts and shapes your bust, helping you look more naturally proportioned and enhancing your overall body shape.
Confidence: When your undergarments fit correctly and are supportive, you’re less likely to feel self-conscious during your shoot, which translates to better photos.

So, what makes a “perfect” bra for a photo shoot? Let’s break it down.


Fit is Everything

The most important factor when choosing a bra for a photo shoot is Fit: An ill-fitting bra will ruin your photos, no matter how beautiful your outfit is. Here’s how to ensure you get the right fit:

Band Size: The band should fit snugly around your rib cage without digging into your skin. If the band is too loose, the bra won’t provide enough support, and if it’s too tight, it may create uncomfortable bulges.

Cup Size: The cups should fully contain your breasts without any spillage or gaping. A too-small cup will cause bulging, while a too-large cup will create a saggy or ill-defined look.

Straps: Straps should rest comfortably on your shoulders without digging in or slipping off. Adjustable straps can help you customize the fit.

If you’re unsure about your measurements, it’s worth getting a professional bra fitting before your shoot to ensure you get the best possible fit.

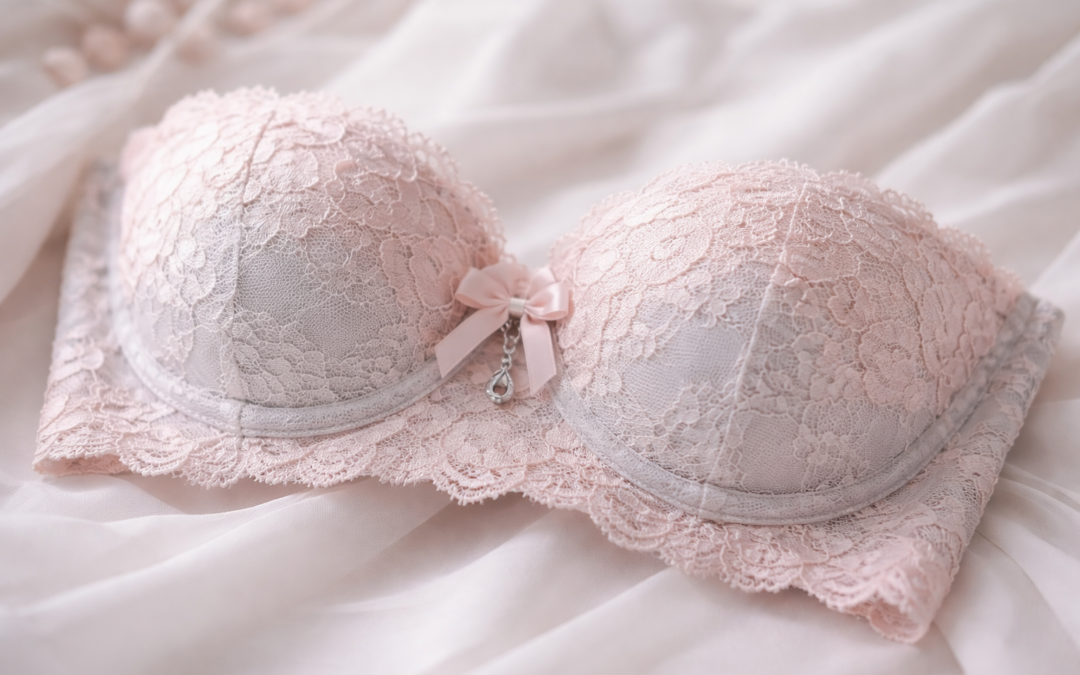
Fabric and Texture: Keep it Smooth or Add Detail

The fabric: of your bra can greatly affect how it looks in photos. Smooth fabrics like microfiber or cotton are ideal for creating a seamless look under clothing. However, if you want to add a little texture or romantic flair to your shoot, lace, satin, or silk can elevate your look.

Seamless and Smooth Bras: These are perfect for most outfits, as they’re invisible under clothing and won’t cause any lines or bulges. They’re often made from materials like microfiber, which is soft against the skin and easy to photograph.

Lace or Silk Bras: These fabrics add a touch of luxury and elegance, perfect for boudoir, maternity, or bridal shoots. They can also add texture and depth to photos, making them stand out beautifully.

Push-Up Bras: If you’re looking to enhance your shape or add more cleavage for a certain look, a push-up bra can help achieve that desired lift.

Consider the Colour

The colour of your bra will depend on what you’re wearing during the shoot. Ideally, the bra should complement your outfit and blend in seamlessly to avoid drawing attention away from your face or body. Here’s what to keep in mind:

Nude or Skin-Tone Bras: These are often the best choice, as they blend well under most fabrics and colours. They’re invisible under white or light-colored clothing, making them ideal for a variety of outfits.

Black Bras: Black is a classic choice for more dramatic shoots or if you’re wearing dark-coloured clothing. However, black can sometimes show through lighter fabrics, so be mindful of your outfit choice.

White or Pastel Bras: If you’re wearing light-coloured clothing, white or pastel bras can be a good match. Just make sure they’re smooth and seamless to avoid any visible lines.

Bold Colours or Patterns: If you’re going for a more playful or bold look, a colourful or patterned bra can add interest to the photo. Just be careful that the color doesn’t clash with your outfit or dominate the shot.

Try a Bra That Works with Your Outfit

Some outfits—especially those with specific cuts like low backs, strapless dresses, or halter tops—require specialized bras. Here are some options:

Strapless Bras: For off-the-shoulder tops or dresses, a strapless bra is your best bet. Look for one with a good band that will stay in place and provide support throughout the shoot.

Backless Bras: If you’re wearing a backless dress, consider a backless bra with adhesive cups or a low-back bra that still provides support without showing in the back.

Plunge Bras: If your outfit has a deep V-neck or plunging neckline, a plunge bra is designed to give support while remaining discreet and invisible.

Comfort is Key

A photo shoot can last for hours, so comfort is just as important as appearance. Even the most beautiful bra won’t work if it’s uncomfortable or causes you to shift positions uncomfortably. Choose a bra that fits well, doesn’t dig into your skin, and leaves you feeling confident. If you’re constantly adjusting your undergarments, it will show in your photos.

Consider the Style of the Shoot

The type of photo shoot you’re doing will have a significant impact on the kind of bra you choose. Here’s a quick guide based on common types of shoots:

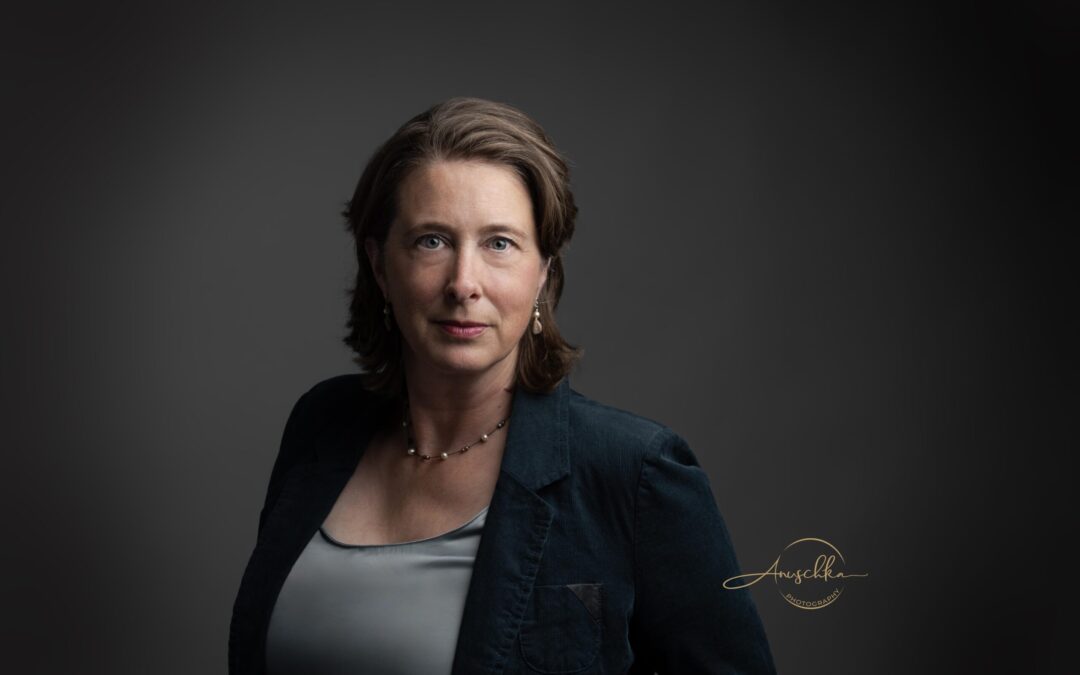
Family Portrait or Headshots: For family portraits or headshots, your bra should be invisible under your clothes—no straps, no seams, no bulges. A smooth, seamless bra with minimal padding will keep your look natural and clean. A strapless bra or bra with clear straps can work well here if you’re wearing something sleeveless.

Maternity Photos: Maternity shoots often focus on showing off the baby bump, so your bra needs to complement the natural shape of your body. A comfortable, supportive bra with soft fabrics and stretch is essential to keep you feeling relaxed and supported as you move. A lace-trimmed bra can add a delicate, feminine touch to the photos, making them feel more intimate and romantic. A strapless bra underneath flowing dresses or fabrics that accentuate your baby bump, often requiring a bra that’s supportive yet unobtrusive.

Lingerie or Boudoir Shoot: For boudoir or lingerie shoots, you have more freedom with your choice of bra. While comfort is still key, you can also go for something with more design, lace, or even a push-up bra to enhance your curves. Opt for satin, lace, or velvet materials that photograph beautifully and add texture to the shots.

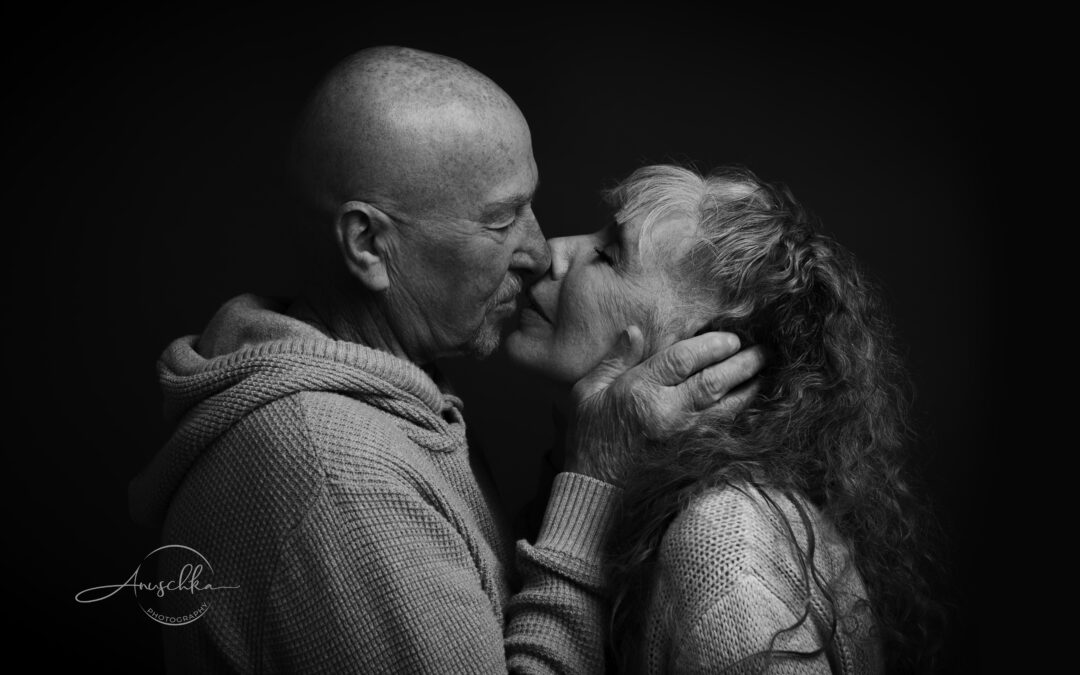
Couple Photos: When it comes couple shoots, the focus is often on elegance and romance. A delicate lace bra or a seamless underwire bra is ideal, as it provides structure and shape without visible lines. For dresses with plunging necklines, a low-back or cleavage-enhancing bra might be theway to go, so be sure to choose a style that suits your dress.

Don’t Forget About the Extras

Lastly, if you’re looking for extra comfort or support, consider adding accessories like:

Bra Inserts or Pads: These can provide extra lift or coverage if needed.
Nipple Covers: For outfits with thin fabric or if you’re concerned about visibility, nipple covers can provide extra security.
Shapewear: If you’re looking for a smooth, contoured silhouette, lightweight shapewear can help with body smoothing without showing through your clothing.

Conclusion

Choosing the right bra for a photo shoot may seem like a small detail, but it’s one that can have a huge impact on the way you look and feel in your photos. Take the time to consider the style of your shoot, the fit, fabric, and colour of your bra, and most importantly, make sure it complements your outfit and enhances your natural shape. When you feel confident and supported, it will absolutely show in your photos.

Contact

Get In Touch With Us

7 + 1 =

The Perfect Time for Family Portraits in a Photo Studio

The Perfect Time for Family Portraits in a Photo Studio

Anuschka’s

Blog

Photographer in Adelaide, South Australia

THE PERFECT TIME FOR FAMILY PORTRAITS IN A STUDIO

When it comes to family portraits, there’s no better way to capture those timeless memories than by booking a professional photoshoot. But the secret to a successful session isn’t just about finding the right photographer or outfit—it’s also about choosing the *right time*. Timing can make a world of difference in terms of mood and how relaxed your family feels. So, let’s dive into when the best time is to get that picture-perfect shot.

Why Timing is Important

While outdoor shoots often depend on weather conditions, booking a session in a photo studio offers the major advantage of total control. No more worrying about the elements or the unpredictability of outdoor light. The studio setting ensures you get consistent, flattering lighting, perfect backdrops, and a relaxed atmosphere all year round.

So whether it’s winter, summer, or somewhere in between, the studio’s environment will make sure your family looks great without the added stress of worrying about the weather.

The Best Time of Day Makes a Difference

The magic of a photo studio is that the lighting is *always* on point. That means no squinting in the sun, no weird shadows, and no wind messing up your hair. However, picking the best time of day for your family is still important.

Morning Sessions:
If you’ve got young kids, mornings are often the best time for a photoshoot. After a good night’s sleep and breakfast, they’re usually in a better mood and ready to smile (or at least not cry).

Afternoon Sessions:
Afternoons work too, but just be mindful of post-lunch energy dips—especially for little ones. If you schedule an afternoon session, do it after the nap and a little snack keep it relatively short to avoid the dreaded “hangry” meltdowns.

Consider Your Family’s Schedule

The best time for a family portrait is whenever everyone can be there and in a good mood! Family portraits often require a bit of preparation, so pick a time when you won’t be rushed.

Weekends or Vacations:
Weekends are usually ideal since it’s when most families are free from the hustle of weekday commitments. If your family is on vacation or having a special celebration, like a birthday or anniversary, it’s also a great time to capture everyone together in a relaxed setting.

Just make sure no one uses the “I’m too tired” or “too hungry” excuse—no one has time for grumpy faces when you’re trying to get that perfect shot!

The Importance of Pre-Session Preparation

Once you’ve nailed down the timing, it’s time to prepare. Make sure everyone’s outfits are ready and that you’ve packed some snacks and drinks. If you’ve got young kids, bribery with a lollipop or a favorite toy might also help. My clients always

Upon scheduling an photoshoot appointment, my clients will be provided with a preparation guide that is packed with valuable tips and insights how to prepare. Having everything ready will ensure your shoot runs smoothly and everyone feels relaxed.

Comfort is Key

A photo shoot can last for hours, so comfort is just as important as appearance. Even the most beautiful bra won’t work if it’s uncomfortable or causes you to shift positions uncomfortably. Choose a bra that fits well, doesn’t dig into your skin, and leaves you feeling confident. If you’re constantly adjusting your undergarments, it will show in your photos.

Conclusion

Capture the Love (And the Chaos)

Ultimately, the perfect time for family portraits in a photo studio is whenever you’re ready to capture those *authentic* moments with your loved ones. Whether it’s the peaceful morning before the rush of the day, a holiday celebration that’s practically begging for a photo shoot, or that magical window when your kids are behaving just enough to be photogenic, the key is to choose a time that feels right for *your* family.

So, plan ahead, pick a time that works for your family’s schedule, and get ready to create memories that will last a lifetime. And remember—it’s not about the perfect pose; it’s about capturing those genuine moments that make your family unique.

And hey, if all else fails? Bribe the kids with ice cream afterwards. It works every time. 😉


Contact

Get In Touch With Us

10 + 6 =

What Happens With The Images After The Shoot

What Happens With The Images After The Shoot

Anuschka’s

Blog

Photographer in Adelaide, South Australia

What Happens With The Images After The Shoot

It’s not uncommon for clients to express confusion about the image editing process or the work that goes into a shoot after the camera clicks. I completely understand this perspective, as I once believed that a skilled photographer simply needed to press the shutter button to capture a great image.

However, the reality is far more complex. After the shoot, the real work usually begins because photography is not just about taking pictures; it involves a multitude of steps that contribute to the final product.
To clarify, the journey of a photograph doesn’t end when the shutter closes.

By sharing this insight, I hope to demystify the process and help clients appreciate the artistry and effort that goes into each image they receive.

Step 1 After A Shoot

First step of post-image production are transfering and securing all RAW files to my PC without making any selections beforehand. Only then does the selection process begin. To be honest this process can be quite daunting sometimes, especially after a long photo shoot with more than 500 images. I’ll go through them, image by image.

During the sorting phase, images where people have their eyes closed, where someone walks into the frame and is not support to be there, or where the lighting is off are typically set aside or even deleted. Additionally, any shots that lack focus or don’t quite capture the intended moment are also filtered out, ensuring that only the best images are selected for presentation.

Step 2 After A Shoot

The second step of post-image production focuses on refining various elements of the image to enhance its overall quality. This process includes fine-tuning highlights and shadows to create a balanced exposure, adjusting contrasts to add depth and dimension, and modifying colours to ensure they are vibrant and true to life. Additionally, achieving the correct white balance is crucial, as it helps to eliminate any unwanted colour casts. Cropping is another important aspect of this step, as it allows for the removal of distracting elements from the frame.

Step 3 After A Shoot

The third step of post-image production involves eliminating any distracting elements that could detract from the overall visual appeal of the photo. This includes removing lint or small wrinkles from clothing, as well as any unwanted distractions that may have crept into the frame.

Additionally, this step involves skin retouching, which addresses smaller blemishes, like pimples, dark circles under the eyes, redness and flaking skin.

Moreover, my favourite part, this stage is not just about correction; it’s also an opportunity to infuse some creative flair into the images.

Step 4 After A Shoot

After completing steps 1-4, I like to take a break. While I usually aim to finish the editing in one session, I make it a point to step away before exporting the photos. This pause is crucial for allowing my eyes to rest and for me to return to the images with a fresh outlook. During this time, I engage in activities unrelated to photography, whether it’s taking a stroll with my partner in the park, cooking dinner, or making phone calls—anything that helps me clear my mind.

Once I’ve taken that break, I come back to my photos with a renewed perspective. This fresh look often reveals areas that might need minor tweaks, like an over-edited section or something that could use more emphasis. It also gives me the chance to reconsider the composition of the images, ensuring that everything aligns with my vision before finalizing them.

I adjust a photo until it feels perfect, a process that can take me up to 30 minutes (sometimes even longer) for each image.

Step 5 After A Shoot

When it comes to your data, I want to assure you that the images you choose are carefully archived for at least one year in case you wish to reorder additional images at a later date, while the unedited raw files are kept for a period of at least six months. I prioritize the confidentiality of your data and handle all client information with care and respect.

However, please be aware that any images you do not select or unedited (raw data) images will remain with me, the photographer, and will not be made available to you.

Conclution

You may be asking yourself why photo editing is even necessary. After all, you’re using a high-end camera paired with top-notch equipment, which should theoretically yield perfect images right out of the box. While it’s true that my camera and I collaborate effectively to capture beautiful shots, the reality is that those images aren’t truly complete until I dedicate some time to refining them. Each step in this process is crucial, as it transforms a good photograph into a great one.

The synergy between my creative vision, the camera that captures the moment, and the computer that finalizes the image is essential.

Each component plays a vital role in the photographic journey, and they complement one another seamlessly. My mind is where the initial concept takes shape, the camera is responsible for bringing that vision to life, and the editing software is what polishes the final product.

Without any one of these elements, the process would be incomplete, underscoring the importance of investing time in post-production to achieve the best possible results.

Contact

Get In Touch With Us

12 + 11 =

12 Tips And Tricks For A Successful Portrait Session

12 Tips And Tricks For A Successful Portrait Session

Anuschka’s

Blog

Photographer in Adelaide, South Australia

12 Tips And Tricks For A Successful Portrait Session

The right reparation is half the battle when it comes to a successful photo shoot, and getting it right can make all the difference. Taking the time to plan ahead not only boosts your confidence but also sets the stage for a smoother experience on the day of the shoot. This means considering everything from your wardrobe choices, make up & co, right mind set, to the specific poses you want to try out. When you arrive well-prepared, you can focus on expressing yourself, rather than worrying about last-minute details.

I have put together a few tips and tricks to help you prepare for the shoot.

The Right Mindset

Women (but also men) share a common sentiment during our first consultations: the belief that they are simply not photogenic. The presence of a camera, especially in the hands of a professional, can trigger nerves and anxiety, making it difficult to relax. Instead of feeling at ease, we often become hyper-aware of our appearance, setting impossibly high standards for ourselves in the process.

This self-doubt can overshadow the joy of having a photo shoot, as we check every detail in photos, focusing on perceived flaws that we fear will be highlighted.

The truth is, the biggest barrier to looking photogenic is the fear of making mistakes or not looking like a super model. Accepting our selves—whether that means being older, heavier, pale, small, young, being simply human—requires a certain bravery. It’s about accepting our insecurities and not allowing them to dictate how we present ourselves.

Ultimately, being photogenic means accepting self-doubt and limiting beliefs and not letting them hold you back. It may seem counterintuitive, but letting go of the desire to look great allows our photogenic qualities to unfold and the photos to look stunning.

Communication Is Key

It’s important to discuss your wishes and expectations with me ahead of time. Clear communication will make it much easier to bring your vision to life. Don’t hesitate to ask questions or provide feedback; I appreciate your input and take the time to understand your needs.

Leave Extra Time

When you rush, it often leads to unnecessary stress and anxiety, which can affect your overall mood and performance. To avoid this, try to plan ahead and give yourself enough time to reach the shooting location. Arriving early not only allows you to settle in and gather your thoughts, but it also provides a buffer for any unexpected delays that might arise.

Visualize A Good Result

Visualizing the stunning photos that will emerge from your upcoming shoot can be an exhilarating experience. Imagine how your wonderful personality shines through each frame. This mental imagery not only builds excitement but also helps to alleviate any jitters you may be feeling. By focusing on the end result — the beautiful images that will capture you — you can shift your mindset from anxiety to anticipation.

Lets Go And Have Fun

How about turning your mind off and just try something new. May be not every shot will be a masterpiece, and that’s perfectly fine — it can be deleted very quickly. What matters is that you end up with beautiful images. Plus, experimenting can be a lot of fun! Remember, enjoying the process is just as important as achieving great results.

Practice Posing In Front Of A Mirror

One of the simplest yet effective tips is to practice your poses in front of a mirror. Give it a shot, and you’ll quickly get a feeling what works best for you. If you need visual ideas of posing positions, consider browsing online platforms like Pinterest or Instagram for posing inspiration.

Movement Creates Magic

Adopt dynamic and lively poses, but move slowly. Change your modeling pose about every 3 to 5 seconds by subtly moving your hands, adjusting your posture, and altering your facial expression.

Upright Posture

To keep your body looking its best, it’s essential to maintain tension at all times, even when seated or lying down.

Avoid common mistakes like slumping shoulders, a rounded back, pursed lips, a tucked chin, and palms facing the camera.

When standing, pull your shoulders back, lift your chest, and engage your core. This posture naturally arches your back and aligns your head and neck, giving you a more confident appearance.

The Turtle Neck

I jokingly call it “the turtle neck”. Just imagine a turtle stretching its head forward. 🙂 During a photo shoot, you’ll have the opportunity to do the same! Why? As strange as it sounds and as awkward as it feels, it usually looks fantastic in photos. Simply put, it prevents/reduces a double chin.

TIP: When you stretch your chin forward, make sure not to point your chin upwards, but to keep it straight.

Position Of Arms And Hands

Avoid letting your arms and hands just hang down. It always looks good to break away from a symmetrical position, as simply allowing your hands to dangle can make you look unprepared or insecure, almost like you’re dressed up with nowhere to go. This can turn a potential great photo into just a casual snapshot.

Check out my blog post for tips on how to position your hands during a photo shoot.

A Charming Smile

Sometimes, you just wake up feeling off for no particular reason, and of course, that’s the day you have a photoshoot scheduled.

To make sure your photos turn out great, try to focus on happy memories or funny moments that bring a smile to your face.

Take a brief pause by closing your eyes for five to ten seconds before opening them again; this can help refresh your gaze and make you look more relaxed.

Additionally, spend some time discovering your favorite smile. It might take a bit of practice, but finding the smile that feels most natural to you can make a big difference in how the photos turn out.

Trust The Process

This isn’t a classroom setting, so feel free to focus on what resonates with you without the pressure to memorize every detail. That’s my role: to support and guide you through the process. Just relax and have faith in the journey. Trust that I’ll capture your best angles, authentic moments, and everything in between. 🙂

Contact

Get In Touch With Us

11 + 1 =

A Photo Shoot Is Like A Mini Journey

A Photo Shoot Is Like A Mini Journey

Anuschka’s

Blog

Photographer in Adelaide, South Australia

A Photo Shoot Is Like A Mini Journey

Photo shoots can be like a delightful excursion or a mini journey, having a new experience, not only for client but also for the photographer. Basically, each session turns into a mini-adventure, where both parties have different paths and still walk together.

Isn’t that beautiful!

For a photographer, these shoots are opportunities to connect with their models while perfecting their craft. The anticipation of capturing a beautiful shot drives them to experiment with angles, lighting, and composition, all the while adapting to the individual energy of each client.

Clients often find themselves having a new experience, having some fun and allowing their personalities to shine through as they interact with the environment and the photographer.

This interaction is based on teamwork, making the shoot feel less like a task and more like a shared journey. As they travel through the session together, both parties contribute to a story that is visually and emotionally compelling, resulting in photographs that tell a client’s story beyond an ordinary image.

The Journey For Me As A Photographer

To me, as a photographer, a photo shoot is far more than the simple act of clicking the trigger of my camera. It is actually a creative journey full with possibilities, ideas and emotion.

The journey begins already before the camera clicks, as I start to plunge into the preparation phase. Communicating and helping to prepare my clients and also selecting props and styling the scene, always awakens a spark of anticipation. Each choice I make is a step toward crafting a visual art work with my models in it, and this careful planning sets the stage for the magic that is about to unfold.

The next step on this journey is when the shoot starts. I find myself in focused moments that deliver beautiful stories through the  engagement with the model. These interactions breathe life into the images, transforming them into images of expression of feeling and connection.

Once the shoot is done, I begin the post-production phase, which feels like a reflective journey back home.

Here, I take the raw image and refine it. I then turn these shots into unique works of art, either through the pure post-processing of light, colours and skin, or through refined artistic visual additions.

The Journey For My Model(s)

A photo shoot for the model can be also compared to a mini journey, so it’s essential to allocate enough time for the experience. Rushing through chores like tidying up, washing dishes, grocery shopping, or tackling your taxes before heading to the shoot can create unnecessary stress. This approach may not set the stage for a relaxing and enjoyable experience.

Instead, envision the photo shoot as a moment to step away from the daily grind, allowing yourself and the other people involved, a pleasant space to breathe and truly engage with the process, thus starting your mini journey by creating a serene environment. This means not only preparing physically but also mentally.

Set aside sufficient time to unwind and gather your thoughts, allowing the anticipation of the shoot to build in a positive way for everyone involved. After all, this is a unique opportunity to celebrate yourself (and loved ones), and it deserves to be approached with mindfulness. Taking the time to reflect and prepare can elevate the experience from a simple task to a treasured moment.

In addition to organising the right outfits, consider treating yourself to a day of self-pampering around the photo shoot. For instance designating a free day, where you prioritise your (and your loved ones) well-being and enjoyment, then indulging yourself to hair, nail (and make-up) treatment before the shoot. Then you may consider a professional massage, a nice dinner, or a visit to the playground afterwards, to enhance your overall experience. This approach allows you to appreciate the moment, ensuring that the memories created during this mini journey are delightful and stress-free.

Contact

Get In Touch With Us

13 + 9 =

Screw your Wrinkles, Love Handles and Scars

Screw your Wrinkles, Love Handles and Scars

Anuschka’s

Blog

Photographer in Adelaide, South Australia

Screw your Wrinkles, Love Handles and Scars

As a photographer but also as an individual, I totally get that the desire for perfect images often comes from our longing to present ourselves in the best possible light. Consequently it is natural to feel uneasy when photographs may sometimes reveal what we don’t like about ourselves.

However, let’s be honest—perfection is an illusion, and acceptance of our selves is far more rewarding.

Self-Acceptance

Self-acceptance is the cornerstone of a fulfilling life. When we accept who we are, we begin to appreciate the beauty in our “imperfections”, rather than constantly measuring ourselves against unrealistic beauty standards or sometimes even just against a friend that has what we want. Wrinkles, love handles, scars, a bigger nose, short legs, … are not simply defects; they are you, marks of a life well-lived, each telling a story and reflecting the experiences that have shaped us into who we are today. It is important to recognize that our self-criticism is often overly exaggerated. Those personal features we often perceive as weaknesses are not deficiencies at all, but rather characteristics that contribute to our individuality.

We unfortunately often see ourselves through a much more critical lens than we see others when it comes to aspects that we consider negative. But every person carries his or her own set of “imperfections,” and it is this diversity that makes humanity unique. By acknowledging and celebrating these differences, we can develop a deeper appreciation for ourselves and also for others, building a more inclusive environment where everyone feels valued. Practising and living self-acceptance not only improves our own well-being, but also encourages those around us to do the same. We can help shift the narrative that beauty lies solely in outward appearances, emphasizing instead that true beauty radiates from within.

Self-acceptance is about recognition of our personal stories, taking pride in our identities, and living according to our values. This journey is worthwhile—not just for our own growth, but for the benefit of the community around us, for your kids, your family, your friends, … In a world that frequently presents a one-sided image of beauty, we have the power to be the change we wish to see, teaching others the importance of self-love through our own example.

How A Photo Shoot Can Help On The Way To Self-Acceptance

A photo shoot can be a fun experience, allowing you to step closer to making peace with your body. Often we have to go step by step down this pathway of self-acceptance, as it’s not an all or nothing process, its not about chasing an unachievable ideal but rather enjoying your very own individuality in each moment as much as possible. Those laugh lines, curves, and the marks of your life’s journey are not weaknesses; they are the unique qualities that define you.

When you allow yourself to be seen as you are, you begin to appreciate your own story. Self-acceptance becomes the most powerful filter, supporting the flowering of your natural beauty.

Together, we can explore the charm of being “imperfect,” as it is precisely these qualities that make you – you. So, let’s get ready to capture the essence of who you are in that moment—smile, and let’s walk on this beautiful journey together!

Simple Exercises To Help On Your Way

I’ve put together a selection of simple exercises that can help you on your journey toward enhanced self-acceptance. Engaging in these activities, particularly in the moments leading up to your shoot, can be beneficial.

They encourage reflection and self-awareness, allowing you to create a more positive self-image. If you feel inclined, I highly recommend dedicating some time to these exercises; they can serve as a valuable tool in building your confidence in general but also preparing you mentally for the experience ahead.

A Loving Message
Let’s start with a small, simple task with a big impact. Use a pen and paper and write a loving message to yourself. This could be a Post-it note that you stick to the side of your computer screen or a small note on your mirror.

The Mirror Exercise
Stand in front of a mirror. Look deeply into your eyes and consciously say to yourself: “I love you and respect you.” Say it 10 times in a row, making sure not to blink. If you blink, start again. Do this exercise several times a day until it becomes easy for you.

Outburst Of Courage
Sometimes it takes courage to accept yourself. In a world where we constantly compare ourselves, where we always want to be better than others, it takes courage to accept yourself.

So go ahead: Have the courage to accept yourself as you are! Because you are lovable.

Formulate positive statements about yourself and repeat them regularly.

A few Examples:

“I am good the way I am”

“I like myself”

“I am lovable”

“I am beautiful”

Or do something even braver, stand at your window or go out into nature and repeatedly shout out loud: “I am great,” “I love myself,” or what ever positive affirmation suits you more.

Gratitude Journal
Write down at least three things you’re grateful for each day. These can be small or big things, experiences, qualities, or situations.
This will help you focus on the positive aspects of your life and yourself.
Regular gratitude journaling helps you develop a positive attitude to promote self-acceptance.

Pro-Self-Esteem
Recognize that it’s okay to be imperfect. Each of us has flaws—that’s what makes us human. It’s your rough edges that make you the person you are. They’re a part of you and have just as much right to exist as your strengths.
Use a piece of paper and a pen and write down a weakness you see in yourself that you don’t like. Or a mistake you’ve made that you judge yourself for.

Then think about why it’s okay and very human to have made that mistake. You’ll see, you’ll immediately feel a little more comfortable with it.

MOST IMPORTANT

Be patient with yourself and give yourself time to develop self-acceptance.


I take back every negative judgement I have ever made about others, and most importantly, about myself, as I embark on my journey of self-acceptance. This act of letting go is not only a moment of reflection; it is a profound commitment to release the weight of past judgments that have held me captive. By acknowledging the harm that these judgments have caused, I am choosing to take a more compassionate perspective, both towards myself and those around me. This newfound freedom allows me to cultivate a sense of acceptance and understanding of my own identity and my surrounding.

Contact

Get In Touch With Us

4 + 7 =

×